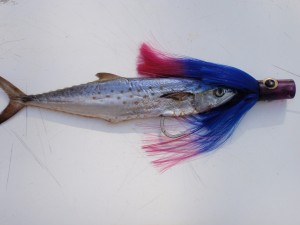
Speaking Spanish
Ken Neill
Photos by Tricia Neill
published in Chesapeake Angler
The Spanish mackerel is highly prized as table fare and they are fun to catch. They are a feisty game fish on light tackle. They also make an excellent bait. A rigged Spanish mackerel is one of the best baits to troll for blue marlin. There are numerous ways to rig them. This is how we prepare a Spanish mackerel on the Healthy Grin.
First, you need a Spanish mackerel. You can buy these already prepared or you can go and catch your own. If you choose the latter, make up a brine cooler for the fish you catch: a slurry of ice, water, salt, and baking soda. We will dump a box of ice cream salt and a box of baking soda into a medium-size cooler full of ice. Add enough water to make it slushy. When you catch a Spanish, it goes right down into this. It will be frozen almost immediately. Back at the dock, wearing rubber gloves so you don’t freeze your fingers, remove the fish from the cooler and let them thaw just a little. Cut open the belly from the anal opening up to the gills and remove the still mostly frozen guts and stick the fish back into the brine solution. When you have gutted all of your mackerel, take the cooler up to your wife’s kitchen. There, you will remove the fish from the cooler, shake off the excess brine, and vacuum-pack your future blue marlin baits. Don’t worry; she will be fine with this.
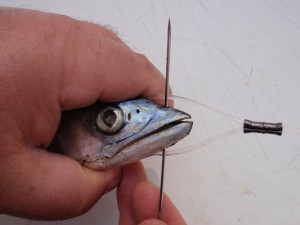
Now, to rig one for trolling: poke a hole into the head of the mackerel. There is a lighter colored spot on the center of the head, just forward to the eyes. You can use that as your target.
Work the eye of your hook up inside the fish towards the mouth, underneath the hole you just made.
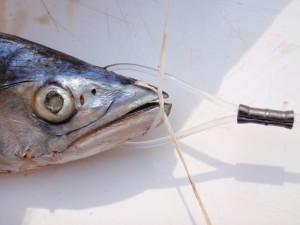
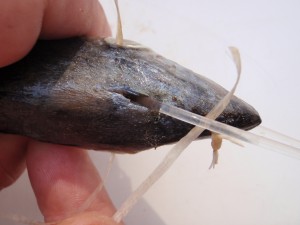
Feed your leader material down through the hole and out through the gills on the bottom of the fish. It is very important that you make sure that your leader has passed through the eye of the hook.
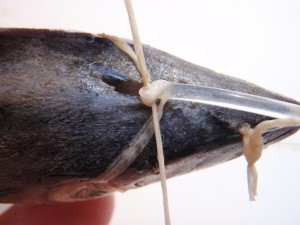
Crimp your leader in front of the mackerel.
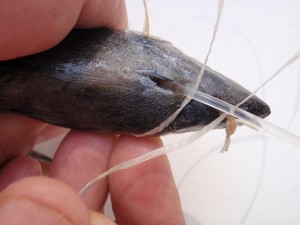
You are now ready to sew you mackerel with a rigging needle and some rigging tape. Start at the gill plates, poking your needle in through one side and out the other and pull your rigging tape through. Leave enough tag end to tie with later.
Sew the belly closed, working your way down to where the anal fin was. We cut this fin off prior to sewing. The tough area where this fin was attached is your ending point.
Now, sew back up towards the gill plates. Use the same needle holes that were made on the way down. You poke less holes in your Spanish but more importantly, you end up with that cool crisscross pattern that makes it look like you know what you are doing.
Finish by going through the gill plates in the opposite direction that you started in. Take the two tag ends and tie the gill plates closed.
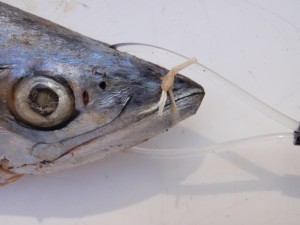
Next, sew the mouth closed.
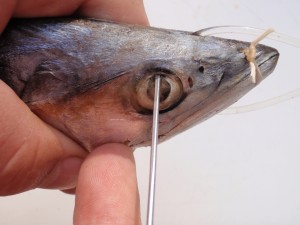
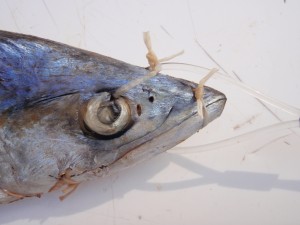
The last thing that we are going to do with the rigging needle is to make a little towing harness. Pass the needle (and thus the rigging tape) through the top of the eye sockets. Take the tag ends from each side of the Spanish and pass them through the loop of your leader, from opposite directions. Tie these tag ends together over the top of your leader.
I like to slide a lure like the Ilander Express on the leader in front of the Spanish: something that is going to cause a ruckus. Pull this in the short rigger position and hang on.


